To get started using Frontier Mail, read the following topics. You can always skip a part and come to it when you need more help.
Access & Open My Mail
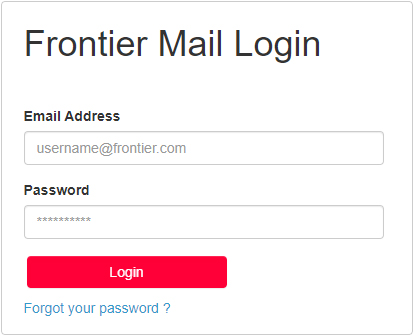
To access your Frontier Mail account:
- Go to login.frontier.com/webmail/.
- Enter your complete Frontier, FrontierNet, Citilink, Newnorth, Epix, or GVNI email address and password and click Login.
- Click Mail to view your Inbox.
To open an email, click either the sender's name or the subject. To return to your Inbox once you have read your email, click the Inbox link and you can view your other messages.
Create & Send Mail
To create and send a new email message:
- Click New under the Mail tab and select Message. A new message window will appear.
- Enter the address of the recipient into the To: field or click the To: button to access your Address Book. Then click to select the recipient's address. If you are sending your message to multiple recipients, follow the same procedure to enter more addresses into the To: field or the Cc: or Bcc: fields.
- Type the topic of your message in the Subject field and type your message in the Text window below.
- Click Send.
Attach a File
To attach an image to your new email message:
- Click New under the Mail tab and select Message. Compose a message as you normally would.
- To add an attachment to the message, click Add Attachment above the To: field. An Attach Files(s) window will appear in front of your message window.
- Click the Browse button. This will bring up the directory of files in your computer (or a removable disk that you specify). Then double-click the file of your choice to attach it to the email message.
- Click Send and the message with your attachment will be sent.
Note: An attachment can be any type of file on your computer, such as photos, sound files, video files, text or graphics files, but it should not be larger than 2–3 megabytes (MB) in size.
If you are forwarding an email with an embedded image (an image that you can see in the message, rather than an attachment), and you want that image to show, you'll need to change one of three possible default settings in Frontier Mail.
- While logged into Frontier Mail click Preferences, then click Composing located on the left-hand side of the window.
- Perform one of the following options on the Composing tab:
- Change Compose As Text to Compose As HTML.
- Place a checkmark in the box to the right of Reply/Forward using the format of the original message.
- Change Forward: When forwarding an email: from Include original message to Include original message as an attachment.
- Click Save.
Delete Messages
To delete a message in your Inbox (or any other folder in Frontier Mail), place a checkmark in the box to the left of the message you want to delete. Click the Trash Can icon located just above the email messages. The messages you delete are moved to your Trash folder and will stay there for seven days unless you empty the trash.
To empty the Trash folder:
- Right-click the Trash Can icon and select Empty Trash, or
- Click to place a checkmark in the box to the left of each message in the trash and click the Trash Can icon, or
- Do nothing at all. Messages left in the trash for more than seven days will be deleted automatically.
You cannot recover messages after they have been removed from the Trash folder.
Create an Email Signature
An email signature is a tagline, or your name and contact information that can be added to the end of your outgoing email messages automatically. This eliminates the need for you to type the same information each time you send a message. To create a signature for your Frontier Mail account:
- Log in to Frontier Mail and click the Preferences tab.
- Click Signatures located below Mail on the left-hand side of the window.
- Enter a name for your signature (such as "my signature") if you prefer not to use Default Identity.
- Enter the contents of your signature as you wish it to appear on your email messages and click Save.
- Click Accounts on the left-hand side of the screen and click to select the account to which you wish to assign a signature.
- In the Persona Settings section of the page, select your desired signature from the Signature drop-down menu, and then click Save.
Use My Address Book
Your address book is a place to store contact information for everyone you might send an email to. The instructions below will help you with each function of your address book, from creating an entry, to updating an entry, to using lists and groups.
Don't feel overwhelmed! You may not need the more advanced features. If you have an address book already, and you'd like to use it with Frontier Mail, click Import An Address Book below. If a friend has sent you an email, and you want to add that friend to your Address Book, click Save Sender to Address Book below. If you'd like to add a contact manually, click Add & Edit Contacts below.
To use your Frontier Mail Address Book when sending an email message:
- Click the New drop-down menu and select Message.
- Click the To: button to access your Address Book.
- Click the name of the person you want to send a message to and click either To:, CC:, or BCC:.
Note: The instructions below assume that you are already logged in to Frontier Mail.
add a new contact to your Address Book:
- Click the Address Book tab.
- Click the New drop-down menu and select Contact.
- Enter the first and last names and full email address of your contact.
- Click Save.
- Repeat Steps 3–4 for each person you wish to add to your Address Book.
To edit an existing contact in your Frontier Mail Address Book:
- Click the Address Book tab and click the name of the contact that you want to change.
- Click the Edit button and change the information as needed, then click Save.
Address Book tab and click All. The entire contents of your Address Book will be displayed.
Mail and click the message from the person whose email address you wish to add to your Address Book.
Note: These instructions are written for Outlook Express but may be similar to several other email programs.) In your other email program:
- Click File > Export > Address Book.
- Select Text File and click Export.
- In the CSV Export window click Browse and select Desktop.
- Save the file as filename.csv and click Next.
- The fields that you will be able to import will already be selected for you. If there are some fields you don't want to keep, remove the checkmark found to the left of any field name.
- Click Finish and close the Address Book Export Tool.
- In Frontier Mail, click Preferences and select the Import/Export option on the left-hand side of the window.
- Click Browse in the Import section of the page.
- Locate the filename.csv file that you saved to your desktop earlier and click File > Open > Import. You should see a message indicating your contacts have been successfully imported.
- Click Address Book to see your imported contacts.
Preferences > Import/Export.
Address Book tab and click the New drop-down menu, then select Contact Group.
Address Book tab and click New Address Book.
